What you will learn:
I am always trying to figure out ways to increase my productivity. It is absolutely necessary when you are a one-person operation and you need to keep cranking out content! While producing classes for the school, I am also keeping my toes dipped into the surface pattern design and illustration I do for art licensing.
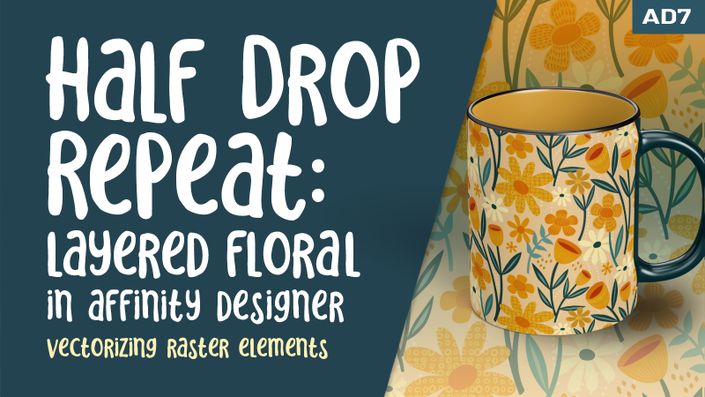
This class, Advanced Floral Pattern Design Raster to Vector, will show you some of my illustration and pattern design methodology, and an all new technique I am using to create inner lines on my motifs that show through to the background color. I want the inner lines to essentially be transparent. There is definitely more than one way to accomplish this, but I think I have figured out the fastest! In the class, I take you from start to finish in creating a full seamless repeat pattern, notably with the inner lines I have just described. I find it gives the over-all pattern consistency. I make sure the pattern swatch we’ll be creating is completely editable and colors can be changed easily. One of my goals is to show you how we’ll be able to recolor it once the pattern is complete and add textures, which are two things I will do in follow-up classes.
Many of the Affinity Designer skills you have already learned will be reinforced. Each time I do a pattern design class for Affinity Designer, new opportunities present themselves for teaching you new skills and efficiency strategies. And I try to always do things in a way that makes it fun and attainable.
In this class I’ll walk you through:
- my step-by-step method for inking flowers with “see-through” interior lines
- tips for creating compositions for a new iteration of a pattern
- my workflow for auto-tracing and creating the initial SVG file
- adjusting colors until satisfied with a color scheme and keeping it simple enough to edit later
- methods for keeping the art fully editable for later adjustments
This is a real-world example of how a surface pattern designer works. Creating collections is imperative to being an artist whose work is saleable. With these pattern design classes, I am creating a continuum of learning that, once complete, will give you the skills necessary to pursue this as one of your possible divergent income streams.
The key concepts I will include:
- review of pattern design methodology specific to Affinity Designer
- how decisions are made with placement of motifs and color choices to produce a beautiful finished pattern
- approaches you can take moving forward with your surface pattern design career
This class takes you from Procreate, to auto-tracing in the program of your choice, and into Affinity Designer for finishing. This workflow may be different for you if you use other software, but all the concepts are applicable for you in the future. If you’ve used Procreate and Affinity Designer before, you will feel comfortable with all the steps.
Concepts covered:
Concepts covered include but are not limited to Procreate inking techniques, vectorizing a raster image, creating color schemes, pattern arrangement, adjusting motifs, the path tool, the node too, the move tool, shapes, color swatches and importing colors, Adobe Illustrator auto-trace, Affinity Designer Asset Studio, Affinity Designer Vector Persona, layering, Affinity Designer Transform Studio, Affinity Designer pattern design, Affinity Designer Color Studio, texture bitmap fills, and much more.
You will get the bonus of…
- 1 hour and 20 minutes of direction from an instructor who has been in graphic design business and education for over 40 years
- knowledge of multiple ways to solve each design challenge
- an outline which you can print and add to your course binder
Project Description
If possible, photograph a bunch of flowers you wish to base your pattern on. If that is not possible, collect a few pics from a royalty free supplier like unSplash or Pexels. You will be making plenty of changes to these photos. Start with a rough sketch in Procreate. Follow my instructions for the inking, using white for any of the lines you want to have “see-through”. Now carry through with the auto-tracing of each layer or flower and export as an SVG file. If the software or service you use doesn’t allow for layered files, output each layer as a separate jpeg or png and individually trace these. Once you have all the SVG’s necessary, open and compile them in Affinity Designer. Follow all the lessons to make as attractive a pattern as possible! Have fun at this stage. It is like solving a puzzle!
The Curriculum
- Intro to Advanced Floral Pattern Design Raster to Vector (2:37)
- Lesson 1 Inking the Florals in Procreate (9:24)
- Lesson 2 Auto Tracing in Adobe lllustrator for iPad (9:31)
- Lesson 3 Exporting and lmporting the SVG File (7:25)
- Lesson 4 Creating an Alternate Color Scheme (6:50)
- Lesson 5 Filling Out and Initial Arranging of the Pattern (8:44)
- Lesson 6 Correcting and Intricate Fitting (8:58)
- Lesson 7 Adjusting the Pattern Components (9:03)
- Lesson 8 Finishing Touches Before Completion (10:08)
- Lesson 9 Conclusion and Wrap Up (2:44)