About This Class
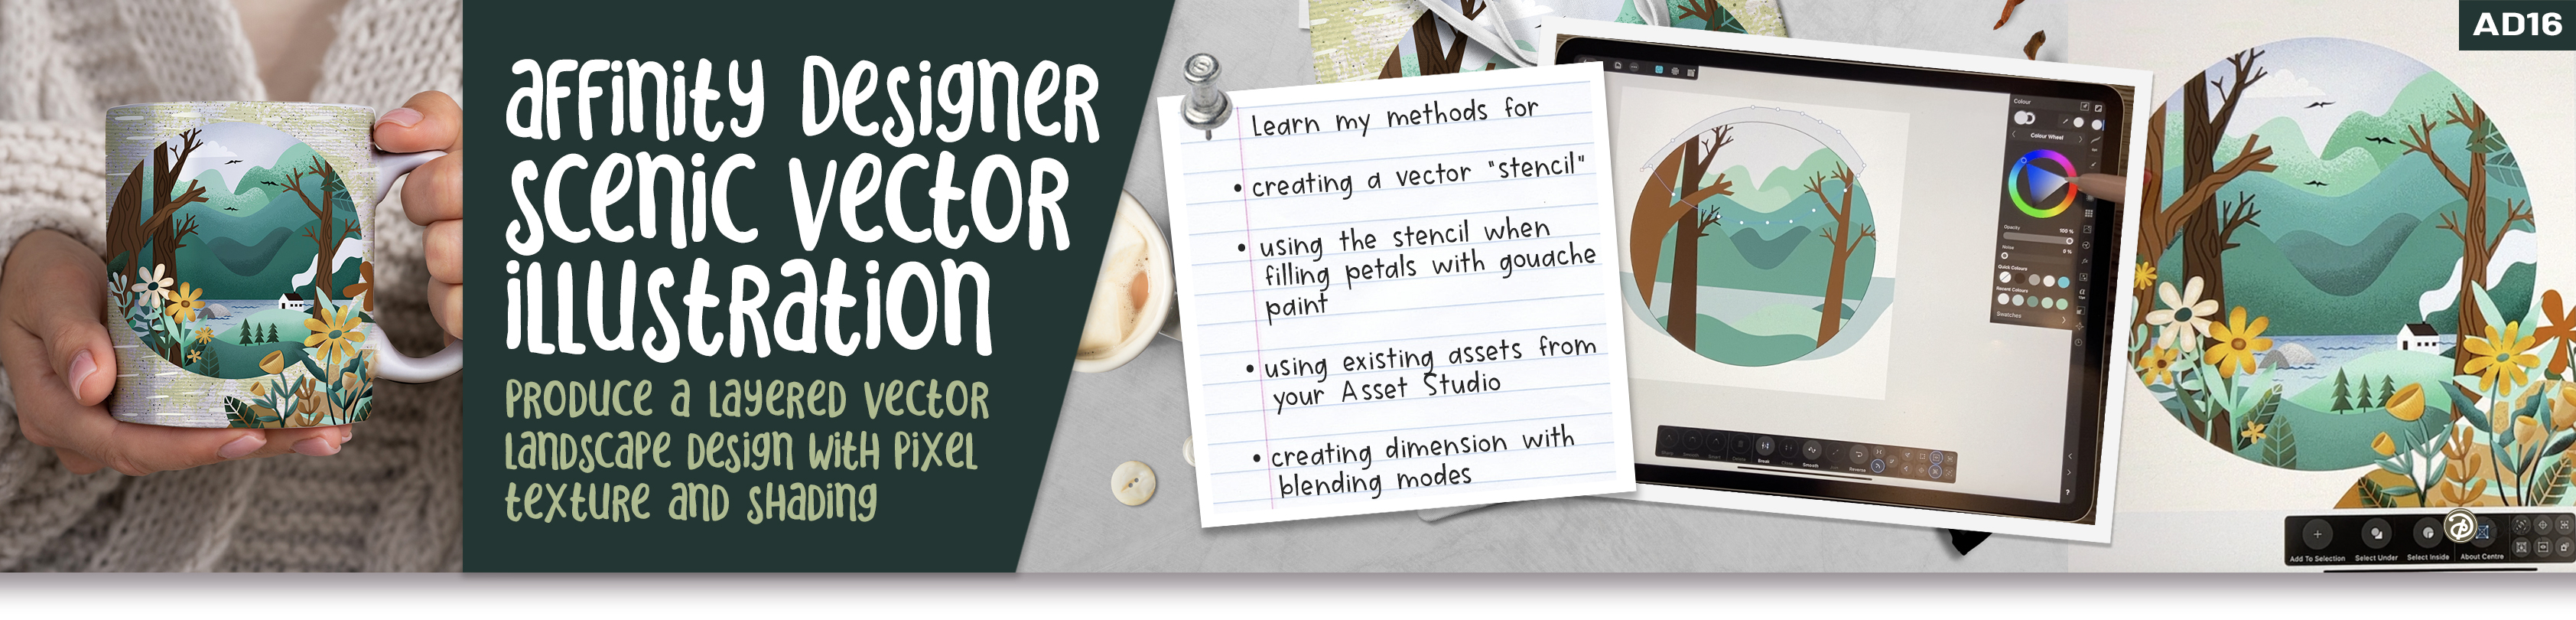
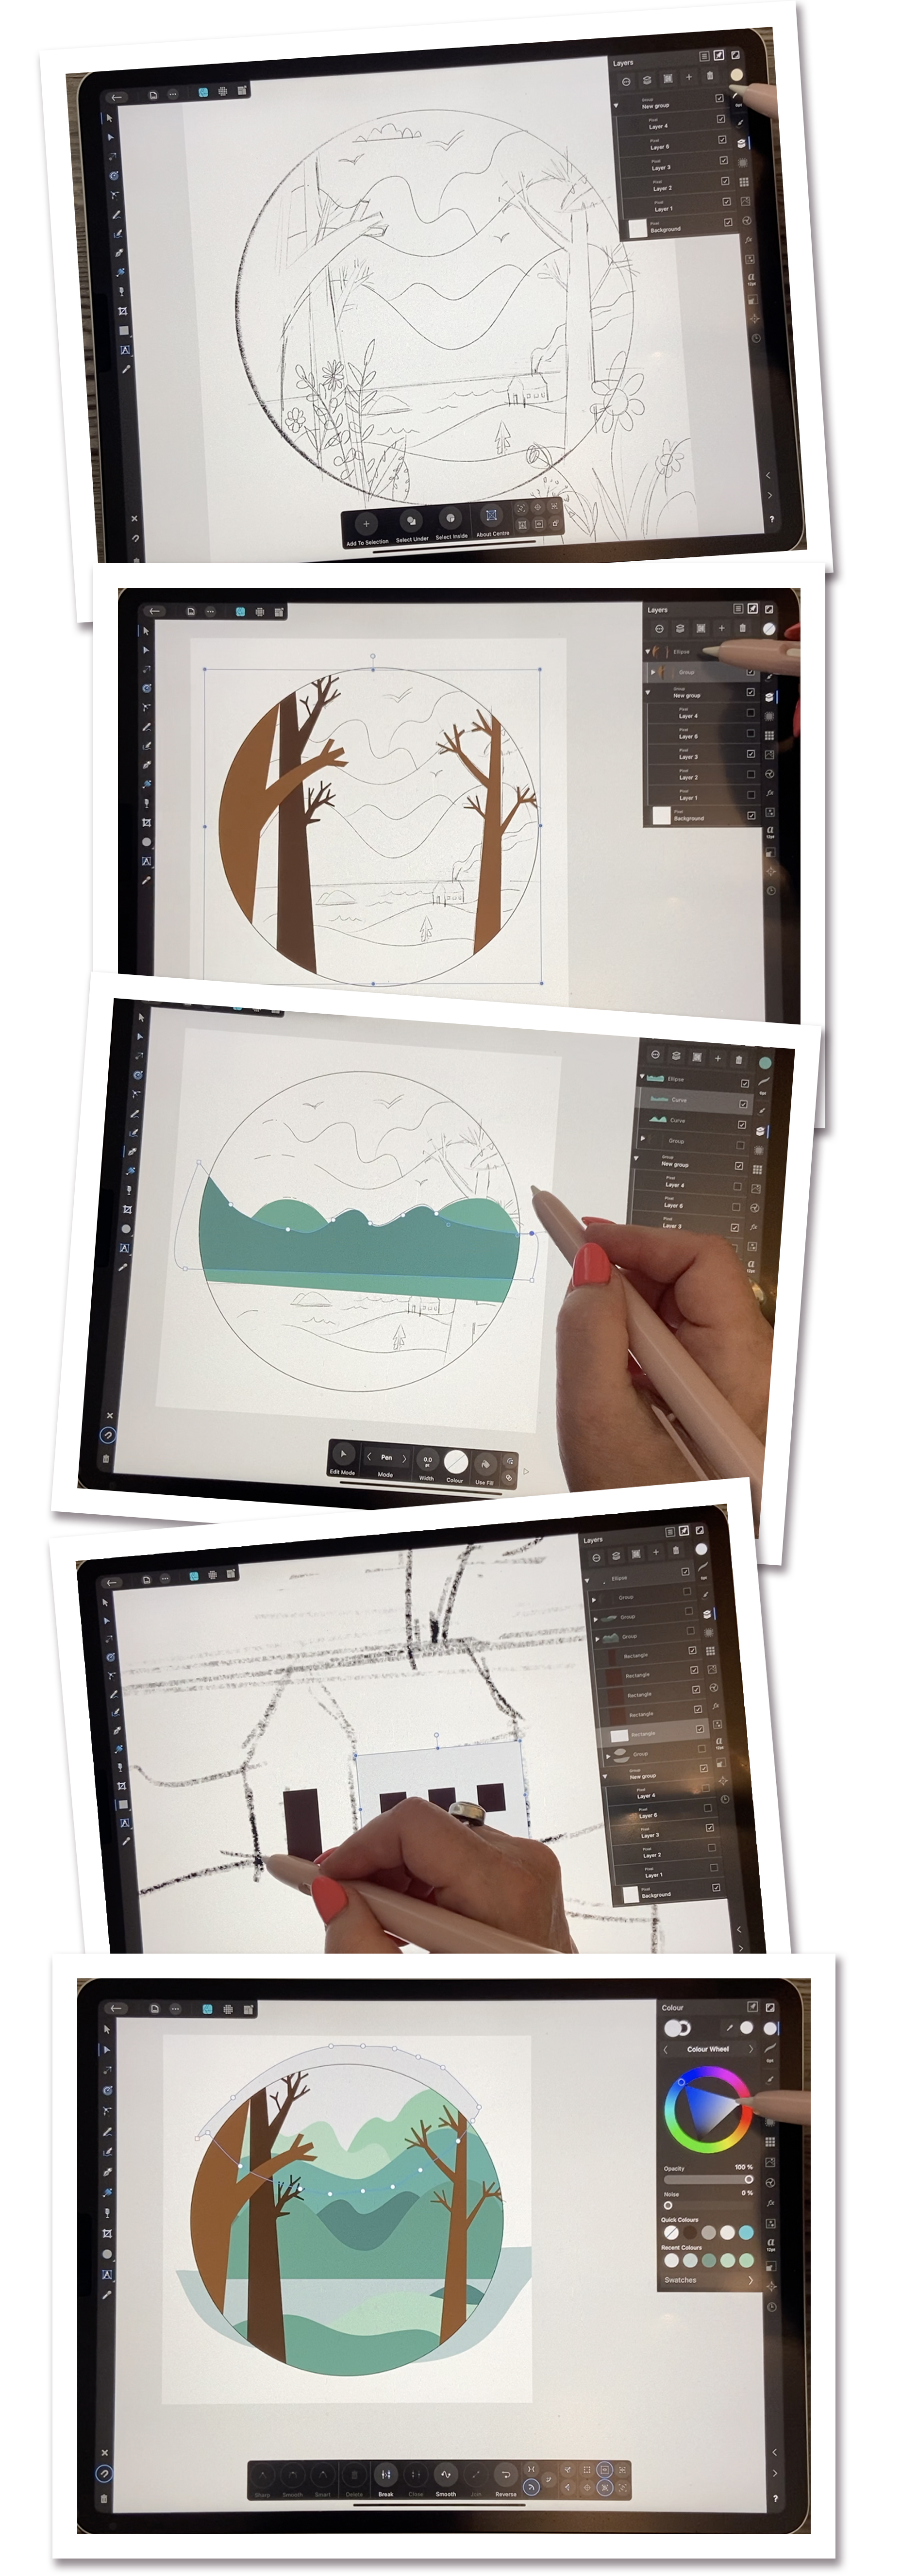
This class, AD 16 Scenic Illustration in Affinity Designer, will help to reinforce what you have learned in Affinity Designer thus far and put into practice your skills using the Pixel Persona. I start with a pencil sketch which I based on some inspiration we will review. Then we proceed to draw all the vectors using either the pen tool or the pencil tool. I show you how to clip the shapes we draw to the circle which will act as a vignette.
This class is packed with so many important workflows which you will learn. We use each of the vector layers we draw as a clipping mask which we will fill with pixel data. The pixel layers are mainly for adding shadows and highlights to add dimension or for giving the components some texture. These pixel layers can still be affected with things like blend modes and adjustments in opacity. Slowly but surely, we advance toward a finished illustration.
I walk you through all the things I did to refine the illustration. I love that this project also employs the use of many of the little floral assets I developed for previous projects. It helps this project to move along quickly. There are many little things that come up, but I show you all my methods so that you can really understand what the goals are and what you must do to perfect the illustration. I show you how to adjust the vectors too, and this can be done at any stage. They always remain fully editable! Once the basics are done, I show you some cool techniques for creating depth and highlights that make the components look dimensional.
In this class I’ll walk you through:
- searching for and using inspiration
- drawing the individual vector shapes
- using vectors as clipping masks
- using the Pixel Persona to add dimension and texture
Working with clipping masks and the Pixel Persona in vector documents is another important skill to learn, and my guidance will help you through the questions you may have. This class will benefit anyone looking to add illustration in a vector program to their skillset.
The key concepts I will include:
- recognizing and creating value areas to show dimension
- working with both the Vector and Pixel Personas in Affinity Designer
- working with layers and blending modes to create interesting effects
- using your existing asset gallery
The more you know about vector software workflows is the more confident you will become. At the end of class, you will have a beautiful layered illustration that you can use for any purpose. Remember to work with a high resolution (minimum 300 ppi) image so it can be used for any purpose afterwards. This would be great for greeting card art or any POD items.
Concepts covered:
Concepts covered include but are not limited to using the Vector and Pixel Personas in Affinity Designer, the Affinity Designer Studios, the pen tool, the pencil tool, drawing vector shapes in the Vector Persona, how to close a shape, clipping masks, Affinity Designer Vector Persona, layering, how to group motif parts and organize layers, Affinity Designer Transform Studio, Affinity Designer Color Studio, the FX Studio, Gaussian Blur, canvas settings, color schemes and variety with color, working with layer blending modes to add highlights and shadows, Affinity Designer composites, and curves, color swatches and lightening or darkening a color quickly, creating a shadow with a Gaussian Blur technique in the FX Studio, and much more.
You will get…
- 62 minutes of direction from an instructor who has been in the graphic design business and education for over 40 years
- knowledge of multiple ways to solve each design challenge
- a supplement sheet explaining the difference between DPI and PPI
Project Description
Take some time to look at reference. I recommend you create a sketch to help you. Create a good palette of colors and get that set up. Once you have that all in place, complete the vector layers. When the drawing is complete, it’s time to start playing with the Pixel Persona. Try different brushes until you arrive at your favorite. Remember to play with opacity and flow to help you with the blending and of course, the blending modes as discussed in the lessons. Remember that at any time throughout the process you can adjust the shapes of the initial vectors.
The Curriculum
- Intro to Scenic Vector Illustration in Affinity Designer (1:43)
- Lesson 1 Overview and Inspiration (8:42)
- Lesson 2 Creating Initial Vector Shapes (11:54)
- Lesson 3 Background Hills and Water (8:22)
- Lesson 4 Smaller Details Including Cabin and Trees (7:46)
- Lesson 5 Using Assets to Fill Out the Art (5:01)
- Lesson 6 Adding More Details and Dimension (9:27)
- Lesson 7 Recap and Finishing Touches (1:46)
- Lesson 8: Conclusion and Wrap Up (2:02)